Showing posts with label gold leaf. Show all posts

Tuesday, March 26, 2013

Bronze and Gold Super Ornate Media Console Transformation

This vintage dresser was an awesome find from a local thrift store. My trusty sidekick, Robin, discovered it. She sent me a photo and I said "YES! Will they hold it until I can get there tomorrow?" She generously bought it, help them load it in her van AND delivered it to me! What a gem! (Her and the console!) This piece didn't sit in my shop too long, until someone wanted it and was open to my suggestion on how to transform it. Note, I completely modified the hardware finish too!
bronze and gold console, media console, gilded furniture, hollywood regency
 
This is what it looked like before, minus the gold faux satin fabric curtain behind the mesh wire on the center doors. It looked like someone had sprayed stain along the top and bottom edges in an attempt to darken the finish. Did I mention they did a lousy job?
 
 
See how dull the hardware was? Yuck! I typically just tweek the hardware finish but this hardware screamed for a facelift.
I knew the piece was going to be bronzey with gold accents. The piece was sanded and thoroughly cleaned. I started with a metallic copper/bronze primer base. This alone greatly improved the piece.
You can see on this door where the hardware was that the piece was originally more golden amber in tone.

 
The doors of course were primed the same way as the base. Since they were being COVERED in gold leaf, I applied the adhesive size directly to the bronze primer. If you would like a more detailed explanation on how to gold leaf, my blog sponsor, The Gilded Planet has some awesome video tutorials on gilding. 
Does it make me weird that I get so excited at how awesome gold or silver leafing looks on really ornate objects? It's an awesome way to transform outdated picture frames and mirrors. I will be hosting a basic gilding kit giveaway starting Sunday night. Be sure to check back so you can enter. Or even better, click that " Get my blog posts sent to your inbox" button on the right so you don't miss out!
Somewhere along the way (which I did not photograph), I top coated the primer coat with a bronze metallic paint. I used Charred Brown Brass from Blue Pearl. Their metallic paint has so much shimmer so that when you glaze over it you achieve a really rich, warm glow.
So here's the piece with the metallic base with the gold foil accents. It would look awesome in Las Vegas! Not so much in the average persons home. That's where the glaze comes in to play.
I used a raw umber oil glaze to tone it all down. You can see the difference in glazed and unglazed. The left picture of the doors show the glazed door on the left. The picture on the right shows everything glazed, except for the top drawer. What an amazing difference!
 
glazed gold leaf, before and after 
 
I let the glaze dry for several days, then coated the entire piece with an oil varnish. It really turned out cool. I truly apologize for my photography skills (or lack of). I am working on it. I think you get the idea. This piece was a beast so shuffling it in and out to try and get better lighting was a challenge.
bronze and gold furniture, gold leafed furniture
 
So don't forget for all the gold leafing junkies out there, I will be giving away a basic gilding kit in the next week. Sign up by email so you don't miss the post. What piece would you transform with a gilding kit for gold leafing?


Pin It
Fluster Buster
Follow my blog with Bloglovin

Tuesday, March 12, 2013

Making Coffered Ceiling Trim Pop with Gold Leafing

gold leafed trim, gilded trim, coffered ceiling
Gilded and Glazed Coffered Ceiling Trim
I'm sure you are beginning to notice a pattern with many of my projects. Lots and lots of gold, silver or copper leafing! There's also leafing with patterns in it. I hope to complete a project soon so that I can introduce you to it. I really love working with it. It can be a bit messy but not in a drippy paint way. More of a bits and pieces of leafing floating around. The good news is, it vacums up easily.
This project has been one of my most favorite lately. We completed some really cool ceilings for this client in their dining room and foyer a few months ago. They really wanted to eliminate some of the white trim without feeling like they had to change all of the trim. Since we had "leafed" the trim on the other accent ceilings, it  was a perfect plan to carry that into the coffered ceiling. So this is how we achieved it.
First, we taped off the trim, separating the crown moulding of the room from the coffered trim. We taped square by square and painted as we went. One coat was sufficient since most of it is covered by the gold. I love to have a bit of the base color popping through the cracks here and there. It adds to the aged look.
Ceilings can be done from a ladder, but scaffolding makes it sooo much better! I highly recommend it. Here's the finished brown.

Next, we brushed on the water based size. This is what makes the sheets of leaf stick to the surface. This goes on milky and dries clear, and of course I neglected to take a photo so you'll need to use your imagination. Once dry,  the real fun begins! Applying each sheet, one at a time. This is actually imitation gold and is really shiny at this point.
I have actually had the opportunity to use 22kt gold leafing before. It's much thinner and the sheets are smaller. I hope to blog about it in a future blog. We continued leafing and worked on the ceiling over the course of 2 days.

The client was a little worried that she had made a mistake.... she thought it was done. I assured her with the glaze it would tone down the shimmer and be perfect. So we started glazing in a burnt umber color. The burnt umber gives a rusty tone to the gold but it was just what it needed. You can see the difference here between the glazed and unglazed. It definitely blends better with the walls and the previously finish ceiling
 
After glazing, we were able to pull all the tape down and see the finished product!
 

gold coffered trim

gilded coffered ceiling
Does this inspire you to try a new finish on any of  your ceilings? Be sure to sign up to receive my posts by email. I will be giving away a basic gilding kit in the near future. This kit is perfect to use on small projects. Maybe a mirror frame update or a small piece of furniture. The Gilded Planet will be sponsoring this giveaway. I love promoting my product sources. I've spent many years finding the products that work for me and my clients and I am proud to share them with  you!

Pin It

Sunday, August 19, 2012

Dramatic Ceilings

I recently began uploading my portfolio to Houzz.com. Another awesome, viral website that is growing like crazy! Anyone looking for new ideas, products or professionals for anything home design related should be looking here. To increase my ranking on Houzz, I need reviews from those familiar with my work. If you are a past client, please take a moment to check it out and let me know if you would be interested in leaving a review. I would really appreciate it! Find me here  http://www.houzz.com/pro/paintingthetownus/painting-the-town-inc.
During the process, I realized I've had some wonderful opportunities to work with terrific clients on amazing projects. Ceilings in particular can be very dramatic. I'm including a few from the past that I thought you might enjoy seeing. Perhaps a little inspiration?
I am so inspired to create some new and wonderful ceilings this fall!! Will yours be next?

Monday, May 21, 2012

Animal Print Silver and Gold Leafed Side Table

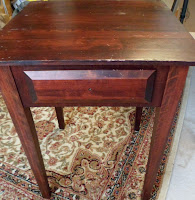
You may remember the small turquoise table I did a little while back http://savardstudios.blogspot.com/2012/04/vintage-turquoise-console-and-side.html. I decided to be a bit crazy with it's mate (although now they don't go together at all!). Such a simple, classic mission style table.
..until I finished with it! Now it's a truly, unique, one of a kind (ooak) side table.

Parts of it are silver leafed, parts are gold leafed. The top was transformed with a zebra print stencil. The legs and drawer were accented with leopard print. The entire table was glazed with a warm brown glaze. Once dry, I polyurethaned the table for durablity, two coats on the top. I used an old cabinet knob and upcycled it by priming, painting, silver leafing, glazing, sealing, then finished it off with black diamond Swarovski cystals. Talk about a blinged out table!! Do you think I'm crazy?! I would love to hear your opinions on my furniture transformations.
Here are the step by step instructions for this table. First I sanded the table and wiped it down. I base coated it with a chocolate brown, furniture grade priming base coat. Color here is not terribly important since I'm covering it with gold and silver leafing. A little color peaks through here and there, but not much. It's classic to do a red base an let a little more color crack through. Here's how the leafing size looks going on. It's milky white but dries clear and sticky.
I did the silver areas first. Once they were leafed, I came back and did the gold areas of the table. After all the leafing was complete, I added the zebra stencil to the top only. 

I used a black glaze for this step because I didn't want it to be solid black. A little more sheer suites my taste better.
Next, I added the leopard stencil to the gold legs and gold drawer face. I think I've mentioned before, I actually hand cut this leopard stencil, many years ago using an exacto knife. I really need to get a new one. There are many places online that will custom make stencils for you. I must do that soon.

Once the stencil design was complete and dry, I glazed the entire table with a warm umber glaze. Love the way this gives the foil a slightly tarnished looked with years of aged beauty and dimension. (Wish I could rub it on me for aged beauty :) ) Since I used oil for this, I let it dry several days before I varnished with an oil satin varnish. The finishing touch on this piece was the upcycled cabinet knob in silver leaf and black diamond Swarovski crystals!

So once again, here's the finished piece.

It's heading over to the Dilworth Blacklion this week. It will be in Booth 409 Eeeklectic Town, www.eeeklectictown.com.  It's already listed on Etsy at www.etsy.com/shop/savardstudios. Shipping on this piece is included. Here's a sneek preview of another clockface table already listed and heading to my booth this week as well. It will be in one of my upcoming blogs!

Related Posts Plugin for WordPress, Blogger...