Showing posts with label silver leaf. Show all posts

Monday, July 8, 2013

Contemporary Silver Circles

I was so excited to execute this finish and share it with you! My client had seen a similar wallpaper but it had a white background. She wanted a soft grey, consistent with the rest of her home.
At first, we were planning to try a reusable stencil with silver paint. I am the eternal optimist. Upon discussing the design with one of my stencil suppliers, we determined a single use adhesive stencil was going to be best. Also, nothing compares to the look of silver leafing. How many times have you heard me say that?
This was no simple task. I wouldn't recommend this for a beginner. We started with the room painted with two coats of an eggshell paint in the same gray that was throughout the house.
The allover stencil pattern was cut into manageable sizes. I started with the middle row and made sure it was level. I taped the stencil to the wall.  Next, I removed the paper backing that allowed me to stick the blue stencil to the wall.
 
Once the blue was securely stuck, I peeled off the protective top paper. The blue vinyl that was left gives the circle pattern that we will silver leaf. 
Quite the slow moving process. To beak up the monotony and repetitive steps, I alternated by adding leafing adhesive to finished areas.
 When that dried, I was able to add the silver leafing. Looking pretty odd at this point. The final step was to apply a sealer to protect the silver. I used a gloss finish to maximize the sheen of the silver.
 

Once that dried, I was able to pull up the blue stencil. Also know as "weeding". This was a bit slow as well.

While this was a lengthy process, the end result was well worth it. Photos never do justice to a completed finish, but this is a really awesome, current design. Next week, you can enter to win a silver or gold leafing kit! What project will you use it for if you win?
 
silver leaf circles, silver and gray walls


Sunday, December 16, 2012

Stunning Pewter Mid Century Gothic Dresser

This might be my favorite dresser make over yet. I briefly considered refunding my client and keeping it. :)
Gothic Pewter Dresser Mid Century

When I saw this dresser, I knew I had to transform it. It has the coolest architectural  lines! I am constantly on the lookout for unusual pieces with interesting details. Many of my aquisitions I list on Etsy in their original state noting they are to be customized. That's the great thing about Etsy. Artist love to do custom commissions for their clients. I like to ponder how I want to transform the piece, so prelisting it gives me plenty of time for that. My vision for this piece was either gloss white with gold accents or gloss black with silver or gold accents. But at last it sold, and when the new owner contacted me she was thinking pewter like a bookcase I had finished some time ago. She had a cool silver mirror and she sent photos.

It looked to be silver leafed to me with a heavy black glaze. So we decided to do the pewter as the main body color and silver leaf all the accent trim and add a black glaze. As always, photos do not do this piece justice. It is stunning! So this is the piece before.
Gothic Dresser Before
The process for this piece is similar to all pieces I transform. I scuff sanded the entire piece and wiped it down. I used a charcoal tinted primer and base coat.


It's a little creepy looking at this point. Don't worry, it get's worse. :) The previous bookcase had bits off red rubbed through so I randomly added some red splotches here and there.

Doesn't it look beautiful now? NOT!
Next, I applied leafing adhesive to all the ornate accents and after that dried about an hour, I started the silver. Here's another piece I silver leafed showing a bit more detail if needed. Silver leafed Chest of Drawers

Next I added a little beeswax to the red areas to aid in the distressing. Then I custom mixed my metallic pewter tint. It's a blend of a dark charcoal color and a warm silver. I coated the top, sides and flat parts of the drawers in this color. I used two coats. After that dried overnight, I used a sanding block to rub off some of the silver showing hints of red.


We used a black oil wash to tone down and darken the piece and to unify the colors.

I used oil because it seems to tone the leafing better than latex or acrylic glazes.
And we are still not done. The final step as always is a polyurethane or varnish. I used an oil satin varnish since we used an oil glaze. This last step really made the piece glow!


So if you've got a ugly, dated bedroom set that you've considered replacing, you should reconsider. Think green and upcycle it to an updated finish. Those old sets transform beautifully and they certainly don't make them that way anymore!


Fluster Buster

Pin It

Monday, May 21, 2012

Animal Print Silver and Gold Leafed Side Table

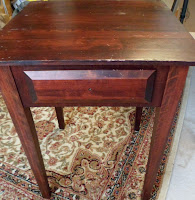
You may remember the small turquoise table I did a little while back http://savardstudios.blogspot.com/2012/04/vintage-turquoise-console-and-side.html. I decided to be a bit crazy with it's mate (although now they don't go together at all!). Such a simple, classic mission style table.
..until I finished with it! Now it's a truly, unique, one of a kind (ooak) side table.

Parts of it are silver leafed, parts are gold leafed. The top was transformed with a zebra print stencil. The legs and drawer were accented with leopard print. The entire table was glazed with a warm brown glaze. Once dry, I polyurethaned the table for durablity, two coats on the top. I used an old cabinet knob and upcycled it by priming, painting, silver leafing, glazing, sealing, then finished it off with black diamond Swarovski cystals. Talk about a blinged out table!! Do you think I'm crazy?! I would love to hear your opinions on my furniture transformations.
Here are the step by step instructions for this table. First I sanded the table and wiped it down. I base coated it with a chocolate brown, furniture grade priming base coat. Color here is not terribly important since I'm covering it with gold and silver leafing. A little color peaks through here and there, but not much. It's classic to do a red base an let a little more color crack through. Here's how the leafing size looks going on. It's milky white but dries clear and sticky.
I did the silver areas first. Once they were leafed, I came back and did the gold areas of the table. After all the leafing was complete, I added the zebra stencil to the top only. 

I used a black glaze for this step because I didn't want it to be solid black. A little more sheer suites my taste better.
Next, I added the leopard stencil to the gold legs and gold drawer face. I think I've mentioned before, I actually hand cut this leopard stencil, many years ago using an exacto knife. I really need to get a new one. There are many places online that will custom make stencils for you. I must do that soon.

Once the stencil design was complete and dry, I glazed the entire table with a warm umber glaze. Love the way this gives the foil a slightly tarnished looked with years of aged beauty and dimension. (Wish I could rub it on me for aged beauty :) ) Since I used oil for this, I let it dry several days before I varnished with an oil satin varnish. The finishing touch on this piece was the upcycled cabinet knob in silver leaf and black diamond Swarovski crystals!

So once again, here's the finished piece.

It's heading over to the Dilworth Blacklion this week. It will be in Booth 409 Eeeklectic Town, www.eeeklectictown.com.  It's already listed on Etsy at www.etsy.com/shop/savardstudios. Shipping on this piece is included. Here's a sneek preview of another clockface table already listed and heading to my booth this week as well. It will be in one of my upcoming blogs!

Monday, April 16, 2012

Silver Leafed 1900's Chest of Drawers

As you all know, I love to bling out some furniture! I found this fabulous old chest of drawers that needed a facelift. (Or maybe just a little "faux-tox".) 

As always, I wasn't sure what direction I wanted to take it. After weeks of consideration on how to revamp this piece, I decided "I yam what I yam, so I'm going silver foil with a slight tarnished look". I call it champagne leaf, because it's not bright silver, but a slightly warmer version like the color of fine champagne. The final picture is at the end but photos do not do this finish justice. It just glows with beauty in person! I sanded this piece in preparation for a tinted primer. I wanted little "cracks" of color to break through the silver in random areas, as well as where some of the square sheets come together. For me, the distressed feel adds to the beauty of the silver leafed finish. Some prefer a totally solid silver finish as well. To save a step, I used a brown tinted primer.
Brown primed dresser drawers


I then added my leafing size on this. Size is what dries sticky so the leafing sheets adhere to the surface. Oil tends to level and give a smoother finish. I use a water base since I prefer that aged, imperfect look. This goes on milky, but dries shiny and clear.
Dry size for foiling
Once dry, I added the silver sheets one at a time. Silver leafing is very shiny!

Once this step was complete, I added a chocolate toned oil glaze to tweek the silver tone. The hardware was in  decent shape, but I decided I just wanted it to be gloss black. I sprayed with a glossy black that was for direct to metal finishes. The final product!! Would love to hear what you think!
Antiqued silver leafed 1900's dresser

I currently have this dresser in my Blacklion Booth in Dilworth www.eeeklectictown.com  and in my Etsy store online http://www.etsy.com/listing/96779441/silver-leafed-chest-of-drawers-vintage

Thursday, January 12, 2012

Love a Silver-leafed Bath Vanity

While looking for fabulous, new bath vanities I found this site http://www.trendir.com. They have some incredibly unique, bath ideas. Some very modern and contemporary vanities, sinks and cabinets, all very unique. Many of the finishes could be replicated to any existing bathroom. The lights, mirror and lines of the vanity are very simple. How awesome is the contrast of the brown and silver? Love IT!
Cerasa Paestum bath vanity in silver leaf finish
Silver leafing the cabinet and adding the crystal knobs would be pretty simple for a professional. I love to do some silver leafing and gold leafing. It would also be a fun project for a motivated do it yourselfer. Be warned, it is messy. You will find silver flakes around your house for weeks! I haven't created a tutorial for leafing, but I found this awesome tutorial from Lindsay Ballard. This is from her Living with Lindsay Blog. http://livingwithlindsay.com/2010/03/teach-me-tuesday-how-to-silver-leaf-a-table.html
The walls could easily be achieved by starting with a flat brown paint, then picking your favorite damask stencil to add some beautiful silver pattern. My favorite resource for stencils is Royal Design Studios http://www.royaldesignstudio.com. They have a huge selection of very current stencils and supplies.
Choose your favorite silver paint, but don't get one with a steel, or blue undertone and you'll be on your way to a fantastic, new metropolitan bathroom!
Related Posts Plugin for WordPress, Blogger...