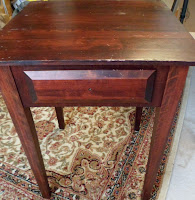
 Parts of it are silver leafed, parts are gold leafed. The top was transformed with a zebra print stencil. The legs and drawer were accented with leopard print. The entire table was glazed with a warm brown glaze. Once dry, I polyurethaned the table for durablity, two coats on the top. I used an old cabinet knob and upcycled it by priming, painting, silver leafing, glazing, sealing, then finished it off with black diamond Swarovski cystals. Talk about a blinged out table!! Do you think I'm crazy?! I would love to hear your opinions on my furniture transformations.
  Here are the step by step instructions for this table. First I sanded the table and wiped it down. I base coated it with a chocolate brown, furniture grade priming base coat. Color here is not terribly important since I'm covering it with gold and silver leafing. A little color peaks through here and there, but not much. It's classic to do a red base an let a little more color crack through. Here's how the leafing size looks going on. It's milky white but dries clear and sticky.
 I did the silver areas first. Once they were leafed, I came back and did the gold areas of the table. After all the leafing was complete, I added the zebra stencil to the top only.
 I used a black glaze for this step because I didn't want it to be solid black. A little more sheer suites my taste better.
.JPG) Next, I added the leopard stencil to the gold legs and gold drawer face. I think I've mentioned before, I actually hand cut this leopard stencil, many years ago using an exacto knife. I really need to get a new one. There are many places online that will custom make stencils for you. I must do that soon.
Next, I added the leopard stencil to the gold legs and gold drawer face. I think I've mentioned before, I actually hand cut this leopard stencil, many years ago using an exacto knife. I really need to get a new one. There are many places online that will custom make stencils for you. I must do that soon. Once the stencil design was complete and dry, I glazed the entire table with a warm umber glaze. Love the way this gives the foil a slightly tarnished looked with years of aged beauty and dimension. (Wish I could rub it on me for aged beauty :) ) Since I used oil for this, I let it dry several days before I varnished with an oil satin varnish. The finishing touch on this piece was the upcycled cabinet knob in silver leaf and black diamond Swarovski crystals!
So once again, here's the finished piece.
It's heading over to the Dilworth Blacklion this week. It will be in Booth 409 Eeeklectic Town, www.eeeklectictown.com. It's already listed on Etsy at www.etsy.com/shop/savardstudios. Shipping on this piece is included. Here's a sneek preview of another clockface table already listed and heading to my booth this week as well. It will be in one of my upcoming blogs!


.jpg)

.jpg)
.jpg)
.jpg)
.jpg)


.jpg)

.jpg)
.jpg)


.jpg)