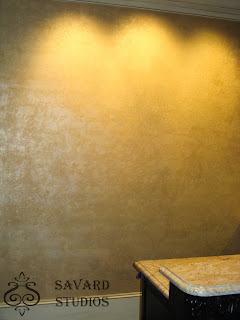
Showing posts with label champagne metallic. Show all posts

Wednesday, May 8, 2013

Spring Madness Not to Be Confused with March Madness

I know I'm not the only blogger out there feeling the additional pressure that Spring brings. Many of us are publishing fewer posts than normal. Even if you don't blog, this is a high pressure time of year. Pressure to garden, pressure to complete projects before the kids are home for the summer, pressure to enjoy the beautiful weather (Ok, maybe that doesn't count), final exams, school wrap up, weddings, graduations...need I say more? Did your heart race just thinking about it?
So needless to say, I'm way behind. Been busy creating just not posting. My youngest graduates high school in one month. My husband turns 50 at the end of the month. I must be a trophy wife 'cause I'm no where near that age! Ha, I wish. And we typically do a big annual summer party late May. So we need to plan a graduation party, a 50th birthday party and the annual party. My head may explode!
We did get away last weekend with some of our awesome friends. This was our 4th annual wine tour! Fondly called our "One Glass at a Time" tour. Our friends, Terri and David do an incredible job planning this every year.

There are a ton of vineyards/wineries right here in North Carolina. If  you haven't checked them out you really are missing out. We drive a few hours and have lunch, then we start on our pre mapped out tour. We usually hit 3-5 places and do their tour and tasting. A few of our favorites are Laurel Gray and Raffaldini. We always meet great and interesting people.

We end close to our hotel and always have an awesome dinner. This year we dined at 21 & Main in downtown Elkin. I had their lamb chops. They were wonderful! If you find yourself in Elkin you should check it out.
Lamb chops with Mint, Broccolini and Potatoes
Monday, I drove 5 hours to Eastern North Carolina to do the annual faux finish touch up in one of my favorite clients 26,000 sq.ft. home. He is a famous author and most of you can probably guess who it is. Here's a few of my favorite finishes in his home. This is a 22K gold leafed coffered ceiling. My friends at the Gilded Planet were vey helpful on this since I had never used actual gold before. It's MUCH thinner than the imitation stuff.
22K gold ceiling
22Karat Gold Leafed Coffered Ceiling
We embedded the words of the first paragraph of his most popular book in this metallic plaster wall. Very subtle but stunning. With textured products you must use adhesive stencils. Cindy can custom make anything you need over at V-mask Foils and Stencils.
words embedded in a wall finish, metallic wall finish
 
You saw this vanity in my last post. We did a champagne leaf finish on the walls in this powder room. Silver leaf with a warm glaze to make it more of a champagne color.
 
silver leafed walls, metallic painted vanity
 
This powder room was a tissue paper texture with a red metallic paint and umber glaze. We used a graphite glaze on the black trim. 
metallic red walls, red walls, black trim
 
In this bath, we stried a blue metallic plaster, then top trowelled a cream and tan metallic plaster.


I spent all day Tuesday touching up minor dings in the finishes, then drove back home. It was a long day and I'm very sad to report my thighs are actually sore from going up and down steps all day. I really need to get back to boot camp.
I have a really cool project I'll be working on this week, so I'll be sure and post about it soon. It involves contemporary circles and silver leaf. Follow me on Twitter or Facebook if you want to see it as it happens.
Then late tomorrow I'm going in for a gastric endoscopy. I've been having some stomach issues for quite some time and am finally frustrated enough to have it checked out. I'll keep you posted on the results.
In closing, I will leave you with this. (My hubby got this for me.. I'm trying not to take it personally.)


Pin It

Wednesday, February 27, 2013

Dramatic Dining Room and Foyer Ceiling Makeover

My client of many years wanted to update the painting in her home. When she moved to her new home, for some reason she hired another artist to do some work for her. They did a fabulous job in the powder room, but the dining room was lacking, for a dining room. It would have been super cute for a kids room or a nursery (see cloud mural below). She wanted to paint over it and do something more elegant. There was also a unique trey ceiling in the foyer as well. We had done a metallic wax finish in the coffered ceiling of her family room several years ago. It had a chocolate base with champagne, gold and bronzey red metallic.
All three ceilings needed to work together. We were repainting the walls to have a warmer, copper undertone. So we decided to do a very similar finish in the foyer. Instead of gold we used copper. We also pulled the copper from the foyer into the dining tray ceiling. Treating the trim the trim of both ceilings with copper leafing added more drama and eliminated some white trim with out feeling the need to do all the trim. Here's the before dining and foyer photo.
Dining ceiling before
Foyer ceiling before
 
Both ceilings were taped off and painted a chocolate brown, including the trim. Then we taped off the trim so we could finish the ceilings. 

 
The dining room ceiling was painted a red bronze metallic in a brush metal technique.


When that was dry, we added a copper metallic glaze. This added additional dimension to the ceiling and softened the contemporary feel of the brushed metal technique.


After this dried overnight, we were able to tape off the ceiling so that the trim could be completed. We did the dining ceiling trim and the foyer ceiling trim in the same color and technique. I order all of my leafing supplies from The Gilded Planet. They have everything you could ever need for gilding. For all the foodies out there, they even have edible gold leaf! That's something I must try someday!
Back to our trim. We applied one coat of water based size. It goes on milky, but dries clear. Once dry, it will remain tacky for 24 hours. Size is what makes the sheets of leaf stick to your surface. It dries pretty quick, less than 1 hour. Now the fun part.. we start applying each 6" x6" copper leaf square side by side. I love an old worn look so I don't work about cracks and holidays. It adds to the character. You can get total coverage if you want that look.
It's very Las Vegas shiny at this point. You can burnish it to tone it down but I prefer to glaze it with an umber oil glaze or even stain can work. I talk about metal leafing in a bit more detail in my Silver Leafed Chest of Drawers post. The Gilded Planet also has some excellent tutorials.
After painting the foyer ceiling brown, we applied our 3 metallic wax colors, champagne, copper and burnished red with a brush then blended it together with a flexible trowel. If you are curious about the technique, let me know and I'll do a tutorial.
 

We did the trim the same as the dining ceiling trim. Once everything was dry, we glazed the ceiling and the trim with the same umber glaze.

metallic tray ceiling, dining ceiling, copper leafed trim
Copper metallic tray ceiling
copper leafed trim, metallic foyer ceiling,
Metallic wax tray ceiling


So which ceiling do you like best?


Pin It


Tuesday, November 20, 2012

Octagon Metallic Ceiling

Last week, we had the opportunity to transform an amazing octagon tray ceiling. It was in a study halfway up the stairs between the first and second floor. A dramatic ceiling, in a dramatic room in a beautifully dramatic home.
Gold and Champagne Metallic Waxed Ceiling

Black accents were scattered throughout the home, so we started with a black base.

We decided to use gold and champagne metallic waxes, blended and trowelled together. The wax looks milky going on, but dries to a brilliant sheen. I love metallic waxes because they give the brilliant shine of leafing or gilding without the extra labor.


Once the wax dried overnight, we used a chocolate glaze to tone down the shiny metallic and bring all the colors together. It was cloudy on this day so my pictures weren't good and when you're glazing you can't stop too long. Side by side, before and after. What do you think? I look forward to hearing your comments. What cool ceiling projects have you done to prepare for holiday guests?


Don't forget to look for me and current projects on Houzz.com at this link. http://www.houzz.com/pro/paintingthetownus/painting-the-town-inc

I hope everyone has a peaceful and joyful Thanksgiving!

Monday, March 12, 2012

French Side Table and Whimsical Coat Rack

A couple of other small, upcycled projects completed recently, include an awesome side table perfect for that Paris style apartment and an old, solid wood cabinet door upcycled into a fun coat and hat rack with an inspirational Dr.Suess quote. I also did the top of an old Duncan Phyffe drum style table. I painted it to look like my favorite distressed clockface. I completed that for "Remember Me Antiques". Scott and Dara have a great little antique shop in Monroe, NC. You can check out their stuff and follow them on Facebook at www.facebook.com/remembermeantiques . Both side tables were transformed using the same paint colors. Typical preparation included rough sanding, wiping down dust and priming. There are some new products out there that allow you to skip these steps. I'm still old school on this process, but will be doing some pieces in the near future using these products. If you are a DIYer, make sure you follow by email so you don't miss this. My basecoat is a satin finish, antique white. A little creamy and warm, not bright and harsh. For the clock table, I printed out my Roman numerals on the computer in the size that I felt was appropriate, using Times Roman font.
Clockface table in process
I also used the font Harrington for the word Paris to go on the side table. Using carbon paper, I duplicated the letter/numbers onto each table. Carbon paper is  my new favorite way to duplicate text. It works very well. The scrolling around the border of the Paris table was hand painted, but you could also use carbon paper for that also. Below picture is before distressing and glazing. Next, I always love to add a little distressing! A firm sanding block with a touch here and there. Lovely French country, cottage chic style.
Paris table before distressing and glazing
Once I am satsfied with the distressing, I rub on a chocolate glaze. It further tones the white and makes the text and distressing a little more subtle. I finish it off with a 50/50 blend of my favoirite flat and satin varnish. You can see the dramatic change below after the distressing and glazing on both tables. I hope these transformations inspire you to transform and old piece of furniture you have or allow me to breathe new life into it for you.
Completed Paris table!
Clockface table after


The coat and hat rack was a similar process, except that the old door had been used as a crackled finish sample for a client and it needed to be freshened up. It had been previously prepped and painted so I just added a fresh basecoat in a canvas white color. My crackled texture was still visible which was perfect. I envisioned a little more drama and color, so I did a soft wash of a champagne metallic glaze and a very soft wash of an aqua glaze. Overall, still going for creamy neutral, but with a pop of fun color! I found an inspiring Dr. Suess quote that I wanted to wrap the border on the hat rack. "Today is your day! Your mountain is waiting, so get on your way.." I found a whimsical font called Viner Hand that I printed in the appropriate size. Using my new favorite carbon paper, I traced the quote around the border.
Tracing text onto coat rack

Text imprint on coat rack

Once the I had the border imprint, I used a sheer champagne metallic wash with some chocolate glaze to fill in my text. The effect is slightly dimensional.
I also added the metallic on the higher points of the cabinet detail. Once dry, I polyurethaned the coat and hat rack. I found some slightly whimsical hardware. I tweeked the color of the hanger hardware by adding a little of my champagne metallic. I measured and lined up the coat hangers, drilled my holes and installed. I also added two D ring hooks on the back for hanging. I though it turned out great! You can also see these items in my online shop. http://www.etsy.com/shop/savardstudios .  Thanks so much for looking!

Related Posts Plugin for WordPress, Blogger...