Friday, March 29, 2013

Weekend Meet and Greet Co-Host Blog Hop #20

I am so thrilled to be chosen by Laurie and Kim to co-host the Weekend Meet and Greet! This is such an awesome way to find new blogs to follow, new friends and new inspiration! You know have a infinite ideas when it comes to painting walls or furniture, but recipes, seasonal decorating or fashion..I'm clueless! I need all the help I can get! This group is a wealth of awesome inspiration! Enjoy!
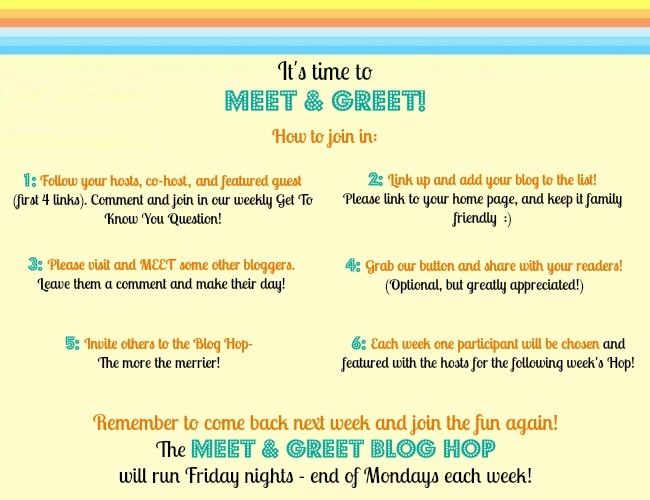
Join in, meet some fellow bloggers, greet them with comments, and grow your blog with new friends! Interested in being a Co-Host? Send an email to 2justByou@gmail.com with "Co-Host" in the subject line for consideration and include your blog link!
Meet Everyone! This week’s get to know you question is: What was your most embarrassing hair style?
*Hosts* Kim - from 2 just B you: Oh no...My worst hair style was when I was a kid and thought I could cut my own hair. I cut bangs, and they were completely uneven. Worst part...Picture Day at school was the next day. And my parents didn't want to fix my hair cut (they said something about me learning a lesson?). So, NO, we did NOT buy those photos!
Laurie - from Created By Laurie: Whenever I get bored I usually will go to a salon and tell the stylist they can do what they think would look good on me. It’s nice to see a different look, usually one I wouldn’t have thought of. This one guy went completely opposite and ending up coloring my hair super dark and cut it to my chin. I know it’s a risk, but hair can be recolored and grows back. I just ended up looking goth for a few days till I colored it again!
  *Co Host* Sandy – from Savard Studios: My most embarrassing hairstyle was from the 80’s big hair days. Permed poodle hair with high poufy bangs. The goal was, how high could you get your bangs? Of course it wasn’t embarrassing at the time, because everyone was doing that. What were we thinking?
*Featured Guest* Shelly – from Company Forty-Two: My most embarrassing hair style is when I cut it all off. I am not kidding. I was having a bad hair day and was sick of dealing with it so I took a pair of scissors and hacked it off. When I went to the salon for them to fix it the only thing they could do is shave it! So one can only image what curly hair looks like growing back in...I looked like a CHIA PET. It took 3 years for it to grow out! I won’t be doing that again ;-)
 
What was your most embarrassing hair style?

  Spread the Word, Grab Our Button!
Now Link Up and Have Fun! If you would like to sign up for email reminders for the Meet & Greet Blog Hop, please sign up below. (Your email address and info will not be used for any other purpose.)


Follow my blog with Bloglovin

Tuesday, March 26, 2013

Bronze and Gold Super Ornate Media Console Transformation

This vintage dresser was an awesome find from a local thrift store. My trusty sidekick, Robin, discovered it. She sent me a photo and I said "YES! Will they hold it until I can get there tomorrow?" She generously bought it, help them load it in her van AND delivered it to me! What a gem! (Her and the console!) This piece didn't sit in my shop too long, until someone wanted it and was open to my suggestion on how to transform it. Note, I completely modified the hardware finish too!
bronze and gold console, media console, gilded furniture, hollywood regency
 
This is what it looked like before, minus the gold faux satin fabric curtain behind the mesh wire on the center doors. It looked like someone had sprayed stain along the top and bottom edges in an attempt to darken the finish. Did I mention they did a lousy job?
 
 
See how dull the hardware was? Yuck! I typically just tweek the hardware finish but this hardware screamed for a facelift.
I knew the piece was going to be bronzey with gold accents. The piece was sanded and thoroughly cleaned. I started with a metallic copper/bronze primer base. This alone greatly improved the piece.
You can see on this door where the hardware was that the piece was originally more golden amber in tone.

 
The doors of course were primed the same way as the base. Since they were being COVERED in gold leaf, I applied the adhesive size directly to the bronze primer. If you would like a more detailed explanation on how to gold leaf, my blog sponsor, The Gilded Planet has some awesome video tutorials on gilding. 
Does it make me weird that I get so excited at how awesome gold or silver leafing looks on really ornate objects? It's an awesome way to transform outdated picture frames and mirrors. I will be hosting a basic gilding kit giveaway starting Sunday night. Be sure to check back so you can enter. Or even better, click that " Get my blog posts sent to your inbox" button on the right so you don't miss out!
Somewhere along the way (which I did not photograph), I top coated the primer coat with a bronze metallic paint. I used Charred Brown Brass from Blue Pearl. Their metallic paint has so much shimmer so that when you glaze over it you achieve a really rich, warm glow.
So here's the piece with the metallic base with the gold foil accents. It would look awesome in Las Vegas! Not so much in the average persons home. That's where the glaze comes in to play.
I used a raw umber oil glaze to tone it all down. You can see the difference in glazed and unglazed. The left picture of the doors show the glazed door on the left. The picture on the right shows everything glazed, except for the top drawer. What an amazing difference!
 
glazed gold leaf, before and after 
 
I let the glaze dry for several days, then coated the entire piece with an oil varnish. It really turned out cool. I truly apologize for my photography skills (or lack of). I am working on it. I think you get the idea. This piece was a beast so shuffling it in and out to try and get better lighting was a challenge.
bronze and gold furniture, gold leafed furniture
 
So don't forget for all the gold leafing junkies out there, I will be giving away a basic gilding kit in the next week. Sign up by email so you don't miss the post. What piece would you transform with a gilding kit for gold leafing?


Pin It
Fluster Buster
Follow my blog with Bloglovin

Sunday, March 24, 2013

Let's Get Social Sunday Co-Host

I am so excited to be co-hosting at the "Let's Get Social Sunday Blog Hop"! It's an honor to be invited by Evelyn and Jamie. Sit back, relax, have a cup of coffee and join us for a fun get together! Check out a few blogs and find some new friends to follow.
let's get social 3


Welcome to Let's Get Social Sunday!

This party is for bloggers who wish to make new friends and gain new followers. It is also an opportunity to link up all your social media sites to gain more followers for blogging opportunities and it increases traffic to all your sites.

Please:)

(1) Follow your hosts and co-hosts in as many ways as possible.

(the first two to four links links in each category)


and


(2) Grab our button and share it on your blog

(3) Let us know if you followed in the comments, so we can return the follows!

(4) Find some new blogs to follow and let 'em know you found them from the Let's Get Social Sunday party. 


*Just a note - If you would like to co-host, we are accepting spots in the future for co-hosts. Please, email Evelyn or Jamie and we will send you the information on scheduling. :)

Let's Get Social Sunday
<div align="center"><a href=" http://www.myturnforus.com/" title="Let's Get Social Sunday" target="_blank"><img src="http://i1048.photobucket.com/albums/s368/lovebakesgoodcakes/LBGC%20-%20reoccuring/LBCG%20Buttons%20and%20Banners/letsgetsocial2button.jpg" alt="Let's Get Social Sunday" style="border:none;" /></a></div>


Not a requirement, but we appreciate the love - If you enjoy this party, would you mind hitting the tweet button to help spread the word? Or share on your favorite social media! Thanks y'all :)


Blog:

Facebook:

Twitter:

Pinterest:

Google+


Don't forget to share and comment ♥

Thursday, March 21, 2013

Does Your Grandfather Clock Need a Makover?

This oak grandfather clock had been in my clients family for a while. It didn't really fit the décor of her fabulous study. You can see how we transformed her study ceiling. We were able to transform her clock while waiting for the ceiling layers to dry. I used my favorite bonding primer/basecoat in black. This product is called Bondago. It's made by a company called Perfetto. It's a very high quality primer that can be used as a basecoat as well. It goes on smooth and levels nicely. Please don't confuse this product with the current trending wall paint that has the primer built in. That product is made for previously painted walls. Bondago is designed for furniture and cabinets not necessarily previously painted. The black is awesome but it also it comes in many different colors, even clear!
Grandfather Clock Before


black gold grandfather clock
Grandfather Clock Black and Gold
Often with black, we distress the edges, but this room had a more formal, grand feel. So we added gold high lights to the edges. It's truly hard to believe it's the same clock. It's like we dressed it in a little black cocktail dress with a touch of gold bling!


The process is the same as always. We taped off the glass and we lightly sanded the clock and wiped it down. We painted one coat of black making sure that we didn't miss anything.
The process moved quickly. Already looking great! You will love this paint!

 
I used a small foam bushed and lightly highlighted in gold all the architectural accents on the clock.
black gold grandfather clock
This was such a simple transformation! I highly recommend using Bondago on your next furniture project. This is a sponsored post but opinions are my own. Perfetto is one of my favorite companies that I get my products from and I have many more products to show you. What piece are you inspired to dress up?


Pin It

Monday, March 18, 2013

Vintage Ornate Bedroom Set Ready for Paint

I found this awesome bedroom set this weekend! I love the look of this old furniture after it's been painted. I grew up with this style of furniture and thought it was hideous. Imagine that! This stuff is SOLID and it transforms beautifully. The large dressers make awesome media cabinets! It is missing a handle so I got a super great deal! 
The nightstand handles are different than the dresser, so I figure the door hardware can be slightly different than the drawer hardware. I found some similar large chunky hardware in this new Etsy shop called Perfect Hat.


I think I can use two for the center doors on the dresser and it will be perfect!  What do you think?
I find it very difficult to photograph mirrors and am still working on that. I think these mirrors would be awesome in a master bath with dual vanities. They are pretty big and heavy.

The queen size headboard is has really, nice detail! This was an awesome find. I usually break up sets and sell the pieces individually. Should I keep the set together? How do you shop for bedroom furniture? Pieces or a matching set? I would love your comments and feedback.

I can not wait to start transforming this! I plan to list it soon! Have a great last week of winter! Yaaayy!

Tuesday, March 12, 2013

Making Coffered Ceiling Trim Pop with Gold Leafing

gold leafed trim, gilded trim, coffered ceiling
Gilded and Glazed Coffered Ceiling Trim
I'm sure you are beginning to notice a pattern with many of my projects. Lots and lots of gold, silver or copper leafing! There's also leafing with patterns in it. I hope to complete a project soon so that I can introduce you to it. I really love working with it. It can be a bit messy but not in a drippy paint way. More of a bits and pieces of leafing floating around. The good news is, it vacums up easily.
This project has been one of my most favorite lately. We completed some really cool ceilings for this client in their dining room and foyer a few months ago. They really wanted to eliminate some of the white trim without feeling like they had to change all of the trim. Since we had "leafed" the trim on the other accent ceilings, it  was a perfect plan to carry that into the coffered ceiling. So this is how we achieved it.
First, we taped off the trim, separating the crown moulding of the room from the coffered trim. We taped square by square and painted as we went. One coat was sufficient since most of it is covered by the gold. I love to have a bit of the base color popping through the cracks here and there. It adds to the aged look.
Ceilings can be done from a ladder, but scaffolding makes it sooo much better! I highly recommend it. Here's the finished brown.

Next, we brushed on the water based size. This is what makes the sheets of leaf stick to the surface. This goes on milky and dries clear, and of course I neglected to take a photo so you'll need to use your imagination. Once dry,  the real fun begins! Applying each sheet, one at a time. This is actually imitation gold and is really shiny at this point.
I have actually had the opportunity to use 22kt gold leafing before. It's much thinner and the sheets are smaller. I hope to blog about it in a future blog. We continued leafing and worked on the ceiling over the course of 2 days.

The client was a little worried that she had made a mistake.... she thought it was done. I assured her with the glaze it would tone down the shimmer and be perfect. So we started glazing in a burnt umber color. The burnt umber gives a rusty tone to the gold but it was just what it needed. You can see the difference here between the glazed and unglazed. It definitely blends better with the walls and the previously finish ceiling
 
After glazing, we were able to pull all the tape down and see the finished product!
 

gold coffered trim

gilded coffered ceiling
Does this inspire you to try a new finish on any of  your ceilings? Be sure to sign up to receive my posts by email. I will be giving away a basic gilding kit in the near future. This kit is perfect to use on small projects. Maybe a mirror frame update or a small piece of furniture. The Gilded Planet will be sponsoring this giveaway. I love promoting my product sources. I've spent many years finding the products that work for me and my clients and I am proud to share them with  you!

Pin It

Thursday, March 7, 2013

Bold Colors for Your Home

If you follow me you know I LOVE color! Along with my color, I'll take a shot of glimmer, glitter or anything shimmery too. According to a recent Houzz article, I might should worry what others think (link at the end of this post). Apparently, understated is most preferred. I'm not a neutral, bright and airy girl. If I want bright and airy, I'll go hang outside. And no floral patterns inside either. But I love my flowers outside. It's interesting that most people prefer a bit of both, bold and neutral. The rest of the folks are extremely opinionated. I guess I fall to the extremely opinionated for color. At one point, my house had a muted turquoise in the dining room, mustard in the foyer and family room and rust walls in the kitchen with a lime green sunroom. Sounds crazy but we loved it. My dining room is still the same. I love my dark turquoise silk drapes. And I got the fabric on clearance for $5.99/yd. because 10 years ago NOBODY was into turquoise.


I'm quite embarrassed that I still have a white ceiling. I guess I paint so many, it's the last thing I want to do in my spare time. I did change my family room and foyer to more of a caramel color but only because I wanted a red leather sectional. Once the red leather sectional came, the rust kitchen no longer worked. It's now a muted olive crackled plaster. The sunroom is still lime green and soon to be on it's way out.

Are you inspired by color or does it make you crazy?

Tuesday, March 5, 2013

Fluster's Creative Muster Co-Host

So I know I've been blogging for awhile now, but just recently have I truly opened my eyes to what that really means. I consider blogging to be my 3rd full time job. I paint in my clients homes by day, then paint furniture and other goodies to sell on Etsy the rest of the time. Then I blog in the remaining spare time. Part of my learning process has introduced me to blog hops or linky parties. You add your blog link along with many other bloggers to a "party". You meet so many amazing people from all over the world and they see your blog as well. It's so cool!!
Last week, I linked up on Fluster Buster's  Fluster's Creative Muster Party. My silver gothic dresser post got the most views so I get an award, and ad space on her blog for a week AND I get to be a co-host this week! I am super excited and I hope you join the party!


Related Posts Plugin for WordPress, Blogger...