Wednesday, January 23, 2013

My Memories Digital Scrapbook Software Review and Give away

I am so excited about this version of digital scrapbooking software! I have been scrapbooking for over 15 years. I love the end result of my efforts. I love looking back at all my hard work and reminiscing. For years, I always felt like I was behind. Working on my albums was a monkey on my back, always needing to be done. About 8 years ago, I went away for a girl's scrapbook weekend. It was awesome! I was able to get so much done during that weekend. It became a tradition! An no more monkey. I just worked on  my albums once per year and managed to stay caught up. It is a lot of stuff to carry around though. Two scrapbookers bringing all of their supplies can fill up the back of a minivan! So on to phase 3 of scrapbooking.  Digital scrapbooking! All I need is a laptop to take with me! So awesome! So my recent girl's weekend wasn't necessarily to scrapbook, but it was a perfect opportunity to check out this amazing software. I have used the online programs before. The one's that develop your pictures and make photo books. They are often glitchy to me, sometimes locking  up while uploading pics. My pictures have to be cropped and ready, then uploaded. Ugh!
With the My Memories software, I tried the design your own page function to create this very simple page that I thought would make a great gift to print and frame and give to our friends that we do an annual wine tour with. I did it with bold contrasting colors, much like I would do with traditional cut and paste scrapbooking.


I found My Memories software very easy to use. It is available in Windows and Mac format. I used the windows version. It is a huge file with a lot of graphics so it does take a bit to upload. My computer was set to hibernate after 15 minutes of inactivity. I changed the setting to 5 hours and clicked upload and went to bed. Not sure how long it took but it was ready to go when I woke up the next morning!

There are also numerous ready made templates within the software and many more free online. If you've depleted all the free stuff and looking for something new, there's also entire "kits" you can purchase at a very reasonable price. You can also join a monthly club for $5.99 that gives you 5 new kits each month. Use can use any font available on your computer. Albums come in all the standard sizes and you can create custom up to 36"X36". I guess if you wanted a poster size you could use that option.

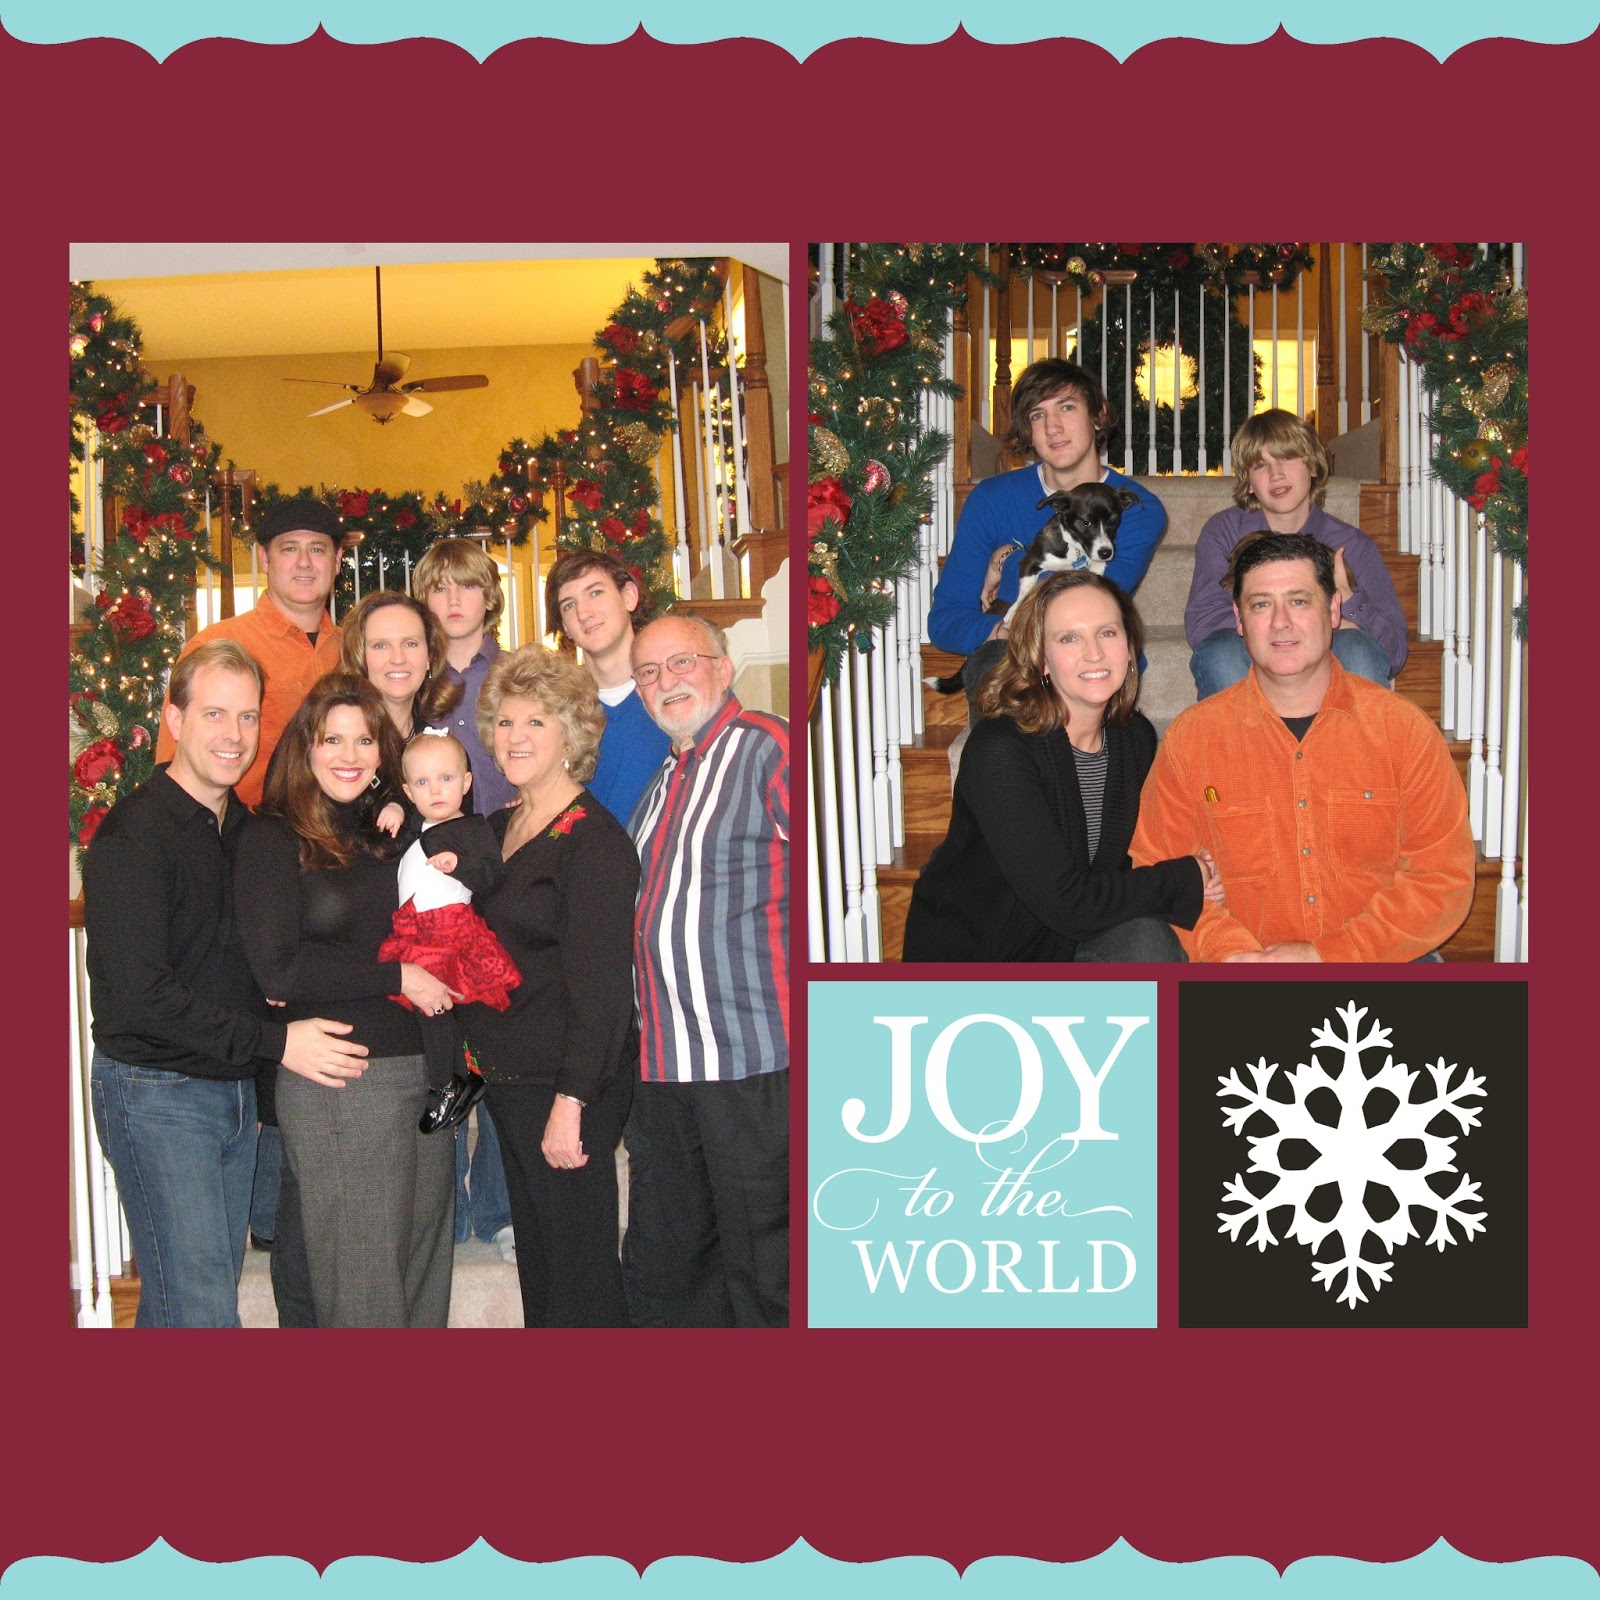
I used this ready made template for Snow/Christmas. We don't get a lot of snow at Christmas in the Carolina's, but we did a few years back. I combined a few Christmas's and snow event's and put this together in under 10 minutes. I spent most of the time looking for my photos since all I had to do was add the photos and change some text. You can even edit your photos with in the software. Add it to your page, then crop, rotate, get rid of red eye. I found that AWESOME! Often, your photos need to be edited before you bring them to your software.


The cost of the printed hard back books are comparable to traditional scrapbooking albums, but you don't have to buy page protectors, supplies, etc. And I'm guessing you could get 5-10 albums in the space of one traditional album! Any you don't have to lift weights to be able to carry them around!

They have so many custom gift idea options as well! Playing cards, puzzles, mouse pads, iphone skins, etc. And of course, cards, stationary and invitations. The website is awesome! Have fun exploring! MyMemories.com  Use this code anytime to get $10 off your purchase. Share the Memories code STMMMS92511.

Here's where you enter for a FREE copy of this digital scrapbooking software! You must go the site and choose your favorite paper pack and leave a comment on this post. Also, follow me on Facebook. You have several other options to get additional entries. Winner will be chosen randomly. Give away runs from Jan 23rd thru-Feb 6th. 


a Rafflecopter giveaway

Thursday, January 17, 2013

Silver Plated Platter Transformation DIY Rusted Finish

We inherited some various silver platters a few years ago. Some sterling, some plated. Some of the plated ones weren't in great shape but had some pretty detail on them. I'm not much into silver. I'm a warmer, gold and bronze kind of girl. Or rust. I have this piece that my wonderful Aunt Edey gave me many years ago when brass was all the rage. When that craze passed, I still loved the piece, but wanted to update it.

Since it worked so well on the brass, I thought, "Why can't I do this on the silver-plated pieces?" So here goes. Here is the piece in the condition that we received it.


The first step is to lightly sand the piece to improve bonding, then wipe clean. The second step is to apply an acid blocking primer. It is red and it stops the rust from eating all the way through the iron paint.

The third step is to apply the iron paint. Yes, the paint actually has iron particles in it! I recommenr two coats. The photo shows the first coat.

After this dried overnight, the fun part starts. Fourth step is to splatter with a special solution to rust the paint. It takes several applications to reach varying degrees of rust. You can brush it, sponge it, spray it or spatter it.

This is the piece in process. Note my rusted studio wall in the background. I love this finish! I would love to live in a castle! No bright and airy rooms for me! That's what the outdoors is for.
Once you reach the desired level of rust, you must apply a sealer to stop the rusting process. It goes on milky, but dries clear.


Once the sealer dries, add a coat of acrylic polyurethane to protect the finish. This is the finished piece! Imagine the possibilities!


Do you have any old pieces that need updating? Contact me or comment if you want to know what products to use.


Friday, January 11, 2013

Gloss on Flat Hand Painted Wall from Pinterest

I haven't posted very much from Pinterest lately, however I repinned this one last week and it's been repinned and like a million times. Ok maybe not that much but A LOT!! Everyone is in awe over this. I've done this gloss on flat technique in the past with stripes and it's pretty cool. If you wanted a little bling, you could also use a silver glaze instead of gloss paint.This particular pattern breathes new life into this paint technique. I have a very similar stencil pattern that I had consider using in my master bedroom years ago. I have new inspiration and will be incorporating this into a project this year. I hope you love this look as much as I do and you all line up to have it done in your home! Otherwise, I'll be redoing something to have it in my own home and my to do list is already a mile long. It's going to be a gorgeous weekend here in the Carolina's. Enjoy!


Source: indulgy.com via Sandy on Pinterest

Monday, January 7, 2013

Savard Studios (AKA Painting the Town) Goals for 2013

My head is always spinning this time of the year! What do I want to change this year? What do I hope to achieve? I've always been very goal oriented, looking ahead at things I am aiming for and laying out a plan to achieve it. Last year (2012) was very difficult for me in that many things were out of my control. Because of that, I have let numerous things go in order to focus on what I can control.
I am continuing on that path this year and forging ahead. Painting the Town has always done well and I will continue to work with all my existing clients and any new ones that come my way. My online Etsy store has done quite well for a first year start up. I will continue my efforts there as well. I do plan to merge the two together under the Savard Studios name. Keeping them separate is too difficult and I like my Savard Studios logo. Watch for those changes coming soon! I have so many ideas for my store and not enough hours in the day, but I will keep adding new items as time permits.
I plan to grow my blog this year by adding sponsors, sponsored posts, product reviews and add some product give away's also. I would love to video how to tutorials on my blog, but I don't think I'm ready for that yet. I would love to hear from you and understand what changes you would like to see.
I have numerous projects around my house that I hope to conquer and share with you.
My sun room walls have needed updating  for quite sometime. The lime green metallic no longer works with anything else in the house. Believe it or not it did at one time.
Lime green metallic plaster
This may also be the year to tackle the ceiling at the same time. My foyer ceiling and dining room ceiling have been neglected for far too long. Time permitting those will see a makeover this year.
My bonus room turned studio has carpet that is 13 years old, has been through boys that were 4 and 6 when we moved in, all their sleepovers and friends, sharpies, kool aid and juice boxes (not allowed on the carpet), 4 dogs over the years (one diabetic), numerous paint projects with no floor protection because I finally gave up caring. Needless to say, it is trashed.

I am embarrassed to show this but can't wait to transform it. Since it is still my studio, I want to be frugal because I paint. As careful as I try to be, paint spatters, spills, etc. So until I retire (is that word even in the dictionary anymore?) I will get creative. I have a crazy plan. I think it will be awesome. It might be a total disaster. Make sure you tune in for the process. I promise it will be something never seen before.
And while I'm throwing it all out there, my master bedroom is crying for some new style. It did get changed about 7 years ago. But I never completed the transformation. Three years ago, we got a puppy. The first "chewer" we've ever had. She ate holes in 2 sets of sheets, while still on the bed. She ate at least 3 pillows with shams. She ate through 2 duvet covers into the down comforter. She ate holes in 2 coverlets. I am not kidding! Its been at least nine months since she's chewed up anything so I hope we are done. You can understand our hesitation to do anything. But I think it's time. It's also time for new carpet. I'll add that to the wish list as well.
I will achieve these things in between "painting the town" and painting furniture to ship all over the world. Like I said, sometimes I have to let things go. Might consider deleting this post......
Related Posts Plugin for WordPress, Blogger...