Wednesday, February 22, 2012

Murals - Hello Kitty Princess and Planets, Moon and Rocket

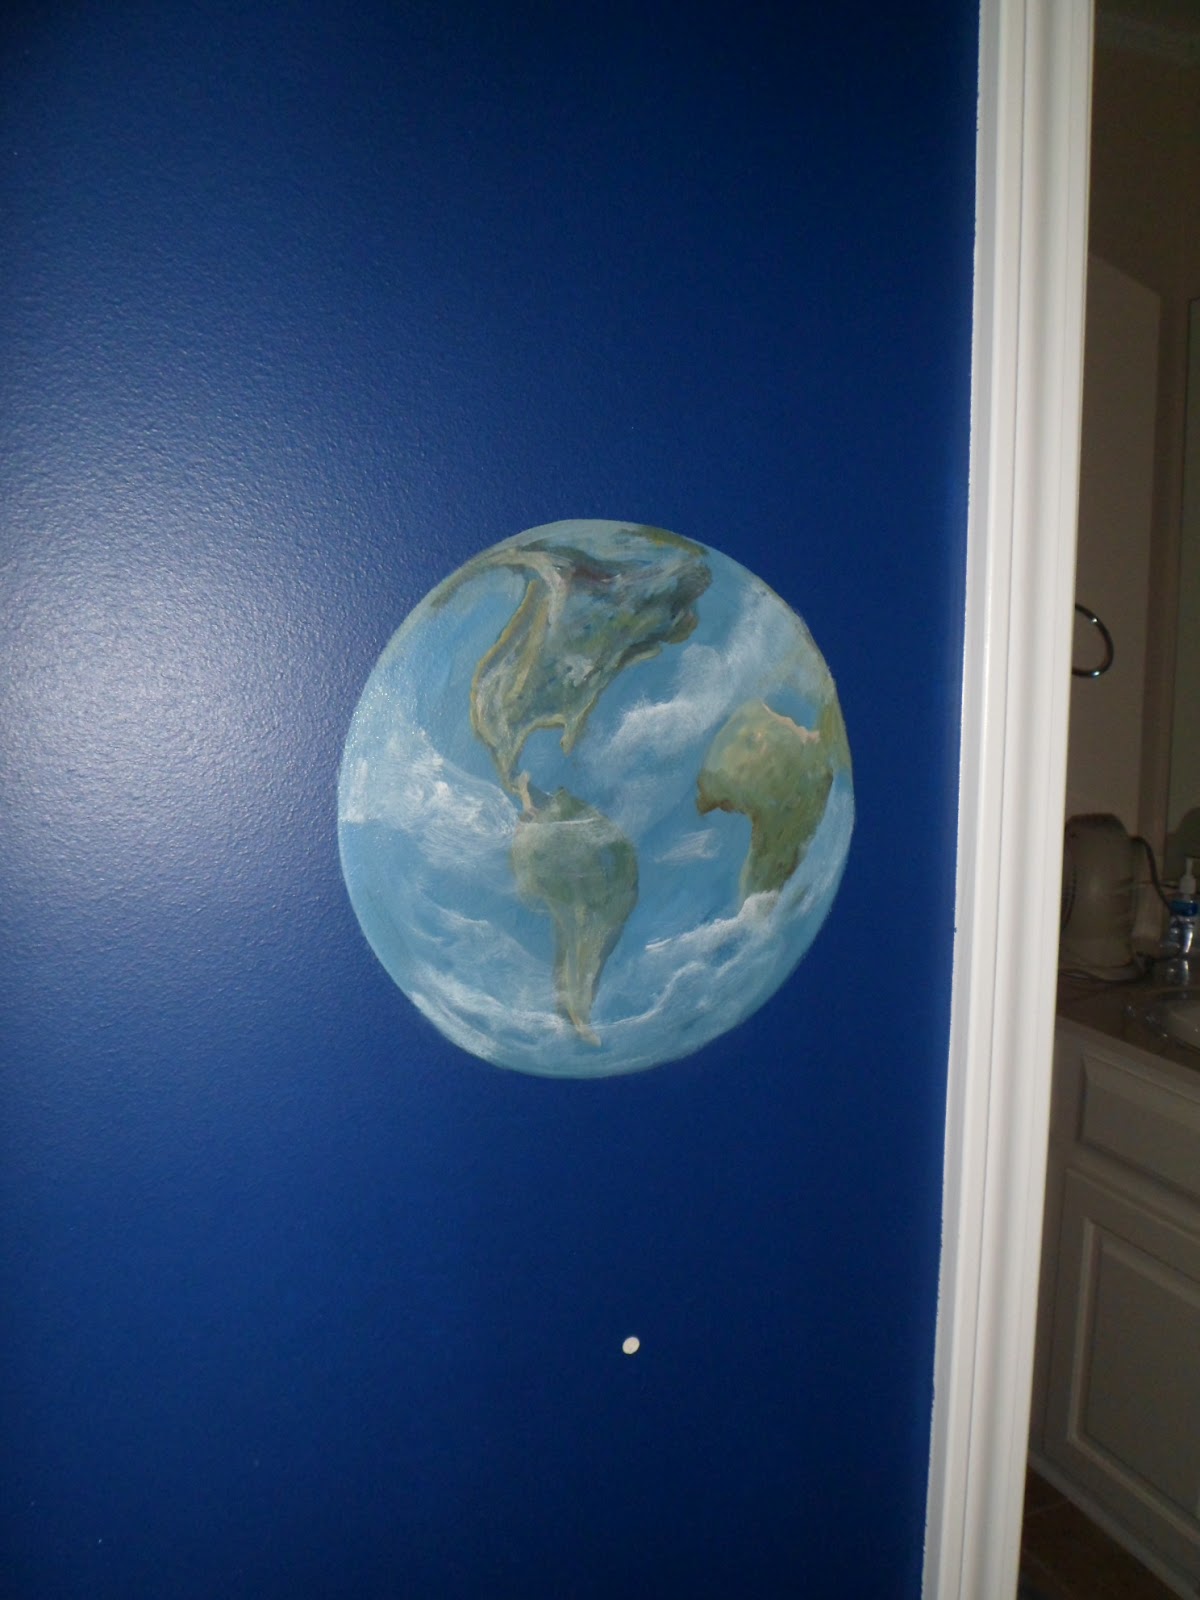
A few fun children's murals to work on the last few weeks! It's so easy to make a three year old happy! (Until they are unhappy and then it's impossible!) Fortunately, I have teenagers now. Haha! (If you've raised teenagers, you know why this is funny. If you have toddlers, you probably don't get it.) We started with the little boys room. He loves space and planets! We decided to paint the room in a beautiful sapphire blue to simulate those beautiful mornings just as the sky changes from pitch black to dark blue. We selected a Sherwin Williams color called Commodore SW6524 in a Matte finish so that it would still clean well and look beautiful on the wall. Then, the fun began. Robin (my trusy, fine art assistant) and I laid out the location of the planets, in the order we learned in school, minus pluto, since it's not a planet any more. (I think there's a few new ones but we're old school, so those don't count.) We used paint buckets, paper plates and bowls to draw our circles in varying sizes. Robin loves detail, so she began to paint the planets in the appropriate colors. I went to work creating galaxies, the milky way and lots of stars and shooting stars. And we couldn't forget the red rocket! Winston was soooooo excited when it was complete! Check out the final pictures.


Next up was the little girl's room. They are twins by the way and she loved the space theme! But Hello Kitty is her favorite. Mom and Dad didn't want to get too crazy with the princess theme, so we decided to do a beautiful bubble gum pink pearly shimmer on her walls. We picked a cute Hello Kitty Princess to replicate above her bed. I printed the picture on multiple sheets of paper and taped them together so that Kitty was about two and half feet tall. We wanted to "bling" her out a little, so I mixed up a irridescent silver glitter for her princess banner and added Swarovski crystals to her crown. Here's a few pictures in process and the final. So perfect for a little girl's room!

Hope you love seeing these simple murals as much as the kids did! To see more examples of murals check out this link http://www.paintingthetown.us/murals.shtml. Check back in, I'll be featuring Robin next with an awesome Peter Pan mural!


Friday, February 10, 2012

Bronze Verdigris Mirror Color Match

I had a small color match challenge this week. My task was to transform an already beautiful and very ornate wall mirror, to match a stunning, bronze verdigris pair of wall sconces. I could tell there were alot of layers of color, most of which I knew wouldn't be an issue. Here's the mirror before, on the left. It was more gold and bronze with some silver and a gray wash. Very nice, but it needed to match a pair of sconces that had more red and bronze with a verdigris wash.  So I mixed up some of my awesome furniture grade primer base coat to be a reddish brown color. I was my basecoat and my primer to ensure adequate bonding. Here it is in process, below right. I would say the color is pretty close to a PPG Porter Paint http://www.ppgporterpaints.com color called Chianti.

The bright metallic gold was easy. I used Modern Masters  http://www.modernmasters.com/  metallic paint in "olympic gold". I used a very dry bristle brush to add a touch of color to all the high places in the ornamentation. I then used a burnt umber glaze to tone down the red and the gold and give it a bit of a tarnished look. I was getting really close to the final product. The sconces had an overall satin finish, but the verdigris was very flat. So, once the glaze was dry I applied the satin polyurethane to the entire mirror frame.
Now the fun part! Getting the right color of green for the verdigris. The illusion against the darkness of the mirror is that the green is pretty light. But once you start making the green wash, you realize it's actually a fairly dark green. I used a flat paint base and just kept adding until I got it dark enough. The color actually ended up being very close to a Porter color called Griffin Gray. I mixed one part paint to parts of my favorite flat glaze. I washed on the verdigris and wiped it off all the high points. Artfully adding a little more here and there. Here's a few shots of the finally match, mirror beside sconce. The client was thrilled with the match!


Sunday, February 5, 2012

Whimsical Tree of Life Wall Mural

Another fantastically fun project I completed last week, was a tree of life wall mural. My wonderful client with fabulously, eclectic taste had a vision for a beautiful painted tree on a very bare hallway wall. She has plans to fill the tree with vintage family photos framed in small, unique frames. Her vision was for the tree to blend in style with her worldly and unique collections. When I first meet with her at her home, I arrived to a dining room table fully set with delectible desserts! Mmmmmm! For me? Yes and no. They were resin/polymer clay replicas! How cute! (But sadly, no dessert for me.) Her items were similar to these I found online at www.etsy.com/shop/FakeCupcakeCreations
Fun Original Hot Pink and Black Polka Dot Chocolate Fake Cupcake Cherry,  Birthday Party Favor, Decor, Gift, Home, Display Stage Photo Prop  Fake Faux Chocolate Turtle Cake Chocolate Caramel Drizzle Pecan Slivers Cherry on Top House Staging, Home Decor Centerpiece Stage Photo Prop
So we discussed the tree size, color and definitely a few lady bugs. I love scrolls and had found a tree of life picture with scrolling branches. She loved it! So that's what we decided on.


With a plan to start this, I spent several hours laying out the "bones" of the tree. The photo at the left is just a a sheer underlayment of the final product. It allows me and the client to see the scale and location of everything very quickly. My client was at work, but I was able to photograph this and send it to her. (Loving technology!) With her approval, I continued to the details. I added some dimension to the branches and trunk, using lighter and darker acrylic paints. Then added the leaves and grass blades, using 3 different colors. And of course the lady bugs! Finally it was complete!


This a was a quick fun project. I hope you enjoy seeing it! If you want to see more of my murals, check out my decorative painting website at www.paintingthetown.us. Thanks so much for stopping by!

Tuesday, January 31, 2012

Upcycling Old Furniture - After pictures

So I've been busy this week and weekend completing the items from my previous blog, Upcycling Old Furniture, http://savardstudios.blogspot.com/2012/01/upcycling-old-furniture. I love dramatic finishes so I think these turned out awesome! For the old teacart, I decided to target those with little girls. It's a treasure cart to display their knick knacks, hang their treasured jewelry or their favorite ballet shoes. It's a very unique accent table. I decided on pink, black and silver shimmer for the color theme, with animal prints and Swarovski crystals.The pink paint is another of my favorite products that gives the shimmer of raw silk (once I have an audience of 1000, I will begin to reveal my sources, so tell all your DIY'er friends to tune in). It's a very versatile and durable paint. Not too flashy, but beautiful! It also has a teeny bit of texture, so it really helped float out the flaws in this vintage piece. To the bottom shelf, I added leopard print in a black pearl metallic. The top of the cart is in the same black pearl, but in a fabulous zebra print!
  
On some of the black pearl parts of the legs, I've added clear Swarovski crystals in varying sizes to add a little more sparkle. The ends of the cart seemed a little blank, so I added 3 clear glass knobs on each side. These can be using for hanging small items.
The wheel spokes are silver leafed and topped with a black glaze. What little girl wouldn't be ecstatic to have this in her room!

The burgundy leather french chair was not nearly as old and it was in great shape. But, I couldn't see any reason not to add my bling to it. This was a custom order for an Etsy client, but I do have another chair just like this on that I will be starting on soon. This client loved the leopard, but wanted a french frame design on the back of the seat, with the leopard inside of the frame. She also wanted the wood to be painted black. So, a little sanding on the wood and a few coats of my trusty furniture grade primer and basecoat in one, finished with a satin polyurethane and we were off to a good start. Next, I used a gold wax metallic to stencil the leather. It requires some cure time and some final buffing, but looks fabulous upon completion! Would love your comments on this piece. It's truly unique and one of a kind!
And finally, the upcycling of the old cabinet door. This door was a crackled sample with two different colors on it. I decided to paint right over the old sample finishes in a bronze metallic. I added a black glaze, a smidgen of gold highlights and the words "coats and hats" in english, french, spanish and italian around the outer border. I found 4 vintage iron coat hooks and mounted them in the middle of the door.Viola! A really awesome coat rack to hang in a back entry, mudroom or foyer. Great accent piece for any decor.
Close up of crackled finish


All of these pieces are available in my Etsy store, www.Etsy.com/shop/SavardStudios or at the BLACKLION Dilworth at 1408-C East Blvd., Charlotte, NC.

Tuesday, January 24, 2012

Upcycling Old Furniture

So this week, I have some wall painting projects that aren't going to be as dramatic as last week. So I thought I show you some old furniture/cabinet pieces I'm working on in my spare time (chuckle).
I have this very old, rickety teacart that a dear friend gave me. It had been in her family for years, but she didn't have a need for it any longer. I wasn't sure what I wanted to do with it, so I've been staring at it for months! I decided I just needed to get working on it. Got my hubby to look at it and with his manly tools, was able to tighten it up and make it not rickety. One of the bolts for the wheels was bent, so he went to our local Indian Trail Hardware store. They were stunned! "Where in the world did you get that? It's really old!" No kidding. They found a suitable replacement (It will likely be silver leafed as well). So this picture is without the wheels attached. This thing was wood at some point, and had been painted various colors over the years.

My vision for this is for a little girl's room. I think it will make a great accent table. Definitely some pink shimmer! I know I'm silver leafing the wheel spokes. Needs some leopard print, just not sure if I'm going black or brown yet. There will be crystals! (Wonder if that could be an academy award winning movie title? Like, There will be Blood, only "There will be Crystals") Bling girls will understand that. So anyway, you'll have to check in for my next blog to see what I decide. I would love some comments or whether to go black or brown with the pink.
I also, have an old painted cabinet door that was used to show some crackle samples to clients. My vision for this is to turn it into an awesome coat rack. I don't have a photo of this, but I'm sure we can all visualize an ugly, painted cabinet door. You are going to love the finished product!

And finally, I have a very cool french chair. Actually, a pair.

They look pretty nice as is, but wait until you see the final. One is sold to a custom order customer, but I'll talk about that process and show you how it turned out. The other is still up in the air. If you're dying to see what we did to this chair, you can see it in my Etsy store.  http://www.etsy.com/listing/91368120/upcycled-french-chair-burgundy-leather
Otherwise, wait till the next blog  (http://savardstudios.blogspot.com/2012/01/upcycling-old-furniture-after-pictures.html) to see the details and pictures. Hopefully, I'll have it up over the weekend. Thanks for stopping by! Can't wait to hear your comments!

Friday, January 20, 2012

Formal Room Transformations - Final Product

Our team has worked hard this week to transform the three rooms from Mondays blog. I'm sure you've been anxiously awaiting the final pictures. All three ceiling are dramatically different, but flow very well from room to room. The dining room ceiling is fantastic! A warm silver metallic blend with a chocolate glaze. Very elegant!
And the green on the walls is the perfect complement. The drapes aren't in yet, but will really pull the chair fabric and wall and ceiling colors all together. They are a black silk with scrolling leafy vines in taupe, red and green embroidery.
The foyer ceiling carrys the dining wall color along with the bronze from the study and the study drape fabric design. The green metallic plaster gives a beautiful silky shimmer inside the coffering. For the scroll design, I enlarged this picture of the study drapes to print on 4 sheets of paper. I taped them together and taped carbon paper to the back. I centered and traced the design into each of the foyer ceiling panels. Then using a chocolate glaze and a blend of bronze and gold, handpainted the design.

We also painted and glazed the wood trim to blend with the wood front door. Much more dramatic than the flat white before. The final product!

And finally, the study ceiling is a perfect blend of the chocolate, gold and champage. We used the same brown base color on the walls and ceiling. In the tray, we trowelled on three wax colors in champagne, gold and chocolate bronze. This was finished with a chocolate glaze as well. The medallion was painted with bronze metallic and lightly dry brushed with a metallic gold.


With the new uplighting, these ceilings will be conversational, showstoppers. Another happy client! For more great visual ideas, check out my website at www.paintingthetown.us.

Monday, January 16, 2012

Formal Room Transformations

Our challenge this week is transforming the walls, ceiling and some trim in the formal dining room, study/home office and entry foyer. It's a stunning house in a beautiful neighborhood, south of Charlotte, NC. We have some artwork and window treatment fabrics that have guided our color selection.
Here is the before shot of the dining room ceiling. Just a big boring rectangle.


Our homeowners have choosen a beautiful sage green for the walls Benjamin Moore color 2142-40. To add some drama to the space, they have choosen a beautiful warm silver metallic for the ceiling with a warm chocolate glaze. The picture to the left is a sample of we plan to do.


For the study, we wanted some warmth and depth. The beautiful trey ceiling barely noticable as is.

We chose a chocolate brown (Benjamin Moore color HC-73) for the walls and soffit. For the trey ceiling, we chose a multi color trowellable metallic wax finish with a glaze.

The foyer walls we are leaving for another time to flow into the rest of the house. But the ceiling is going to be fantastic! It's pretty unnoticable now. It's a barrel coffered ceiling. But all one color and light.

We are going to paint and glaze the barrel trim to look like wood. Inside the wood coffers, we will use a sage green similar to the dining room wall color. But it's a spectacular green metallic plaster! This sample does not do the finish justice (or maybe it's my phototgraphy skills or lack of?).

This is a trowelled finish and there are numerous metallic plasters out there. Someday soon, when I have enough followers asking questions, I will reveal my sources. This sample shows a beautiful stencil done in glassbeads. We didn't want the raised texture of the glass beads, so we will be using a sheer bronze paint. Once the plaster is complete, I have a custom design we will hand paint in the center of each panel. The design has been pulled from the pattern in the study window treatment. This will keep us busy this week. (Please send massage therapy gift certificates if you are feeling generous.) I hate to leave you hanging, but we must finish before I can show the final product. If you need some immediate visual drama, check out my decorative painting website at www.paintingthetown.us. Otherwise, please check back on Friday to see the finished room transformations.  See after pictures here http://savardstudios.blogspot.com/2012/01/formal-room-transformations-final.html.
Related Posts Plugin for WordPress, Blogger...