.jpg) |
| Console before |
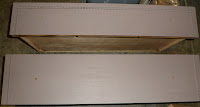
Turquoise is one of my favorite colors these days, and it it HOT in the interior design world. I scored this awesome vintage 70's console. Perfect to finish and post for sale! The side table was done in the same color, but was for a custom order. I decided to try a new awesome European paint on the market. I goes straight over most surfaces with no sanding or priming! How awesome is that! It's finished with clear or tinted wax instead of polyurethane or varnish. Here's the before pictures of each piece.
 |
| Side table before |
 |
| Applying second coat |
I didn't sand, but I did wipe down both pieces. The first coat of chalk paint went on easily, but didn't quite give the coverage I wanted. I let it dry overnight before putting on the second coat. This is a photo as I am appling the second coat. You can see the coverage on the first coat was pretty good.
I love the detail of this console. Very heavy ornate trim. A perfect piece for distressing and "glazing".
Here's the side table with both coats completed.

I used their recommended wax. Since I wanted to "antique" the look on these pieces, they have to be clear waxed first. This seals the paint so that the colored wax doesn't absorb unevenly. I used a small brush to get the wax into the grooves and used a t-shirt clothe to buff the flat surfaces and spead the wax evenly. Waxing was a very different experience for me. It seemed a little more labor intensive than a traditional paint and glaze finish. May be it's just something I'm not used to. I let the clear wax dry a few days, before I could distress the finish. This is achieved with a rigid sanding block and 100 to 120 grit sand paper. I hit the edges and high points in the detail. I even added some within the body of the flat areas.
Once the distressing was complete, I mixed a little raw umber with my wax. They actually make a tinted wax, but a little wax goes a long way, so I thought I'd just tint my own. Using the same technique, I brushed the tinted waxed into the grooves and used a soft cloth to move it around and give the pieces an aged look. For the side table, I added a fern stencil to the top. I added some warm silver metallic to the clear wax.
 |
| Fern Stencil |
The warm silver gave a very subtle accent to the top of the table. A very nice, unique accent on a popular pop of color, on an otherwise boring table.
The console turned out awesome too. I really wanted to paint the handles red, but decided a bronze paint would be more universally appealling. "Universally appealling"....such an ugly phrase. Maybe I should have done red... I would love your opinions and feedback! I love hearing from you all!
 |
| Completed vintage console |
 |
| Completed side table |
The product I used on these pieces can be purchased locally in Charlotte, NC at Great Walls Supply. Check out their website!
http://www.greatwallssupply.com/ And as always, the console is currently for sale in my Dilworth Blacklion store on East Boulevard, and online in my Etsy store
www.etsy.com/shop/savardstudios

.jpg)

.jpg)
.jpg)


 I used their recommended wax. Since I wanted to "antique" the look on these pieces, they have to be clear waxed first. This seals the paint so that the colored wax doesn't absorb unevenly. I used a small brush to get the wax into the grooves and used a t-shirt clothe to buff the flat surfaces and spead the wax evenly. Waxing was a very different experience for me. It seemed a little more labor intensive than a traditional paint and glaze finish. May be it's just something I'm not used to. I let the clear wax dry a few days, before I could distress the finish. This is achieved with a rigid sanding block and 100 to 120 grit sand paper. I hit the edges and high points in the detail. I even added some within the body of the flat areas.


.jpg)


